
Welcome back to our 1967 Yellowstone restoration project. Today, our plan is to start roughing in our 12 volt and 120 volt wiring. And later, we’ll start working on our new floor plan design. Let’s get busy.
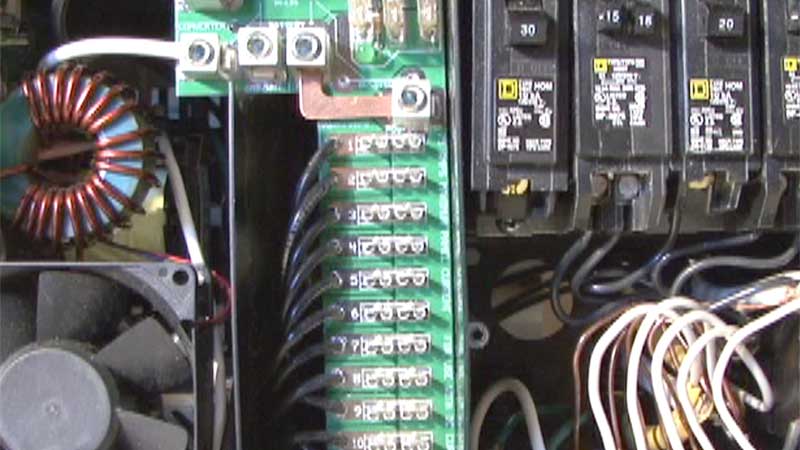 When we purchased the trailer, there was no power converter or power distribution center. Our plan was to completely upgrade the 12 volt and 120 volt wiring. We’re adding a lot of new 12 volt and 120 volt accessories, so it will be a 30 amp, 120 volt electrical system. To accomplish this, we used a Progressive Dynamics power control center. The model we chose had enough circuits to support what we plan to add, and it came with a 60 amp converter and a three stage battery charger built into the unit.
When it came to wiring the trailer, the first step was to rough in all of the wiring. To do that, we needed some kind of a plan for what electrical components were going in the trailer and where each of those items would be located. The best way to do that was to sketch it on a piece of paper. You don’t need to be an artist, but you do need to think about everything in advance because the time to run the wiring is while the trailer is down to the bare studs. If you don’t understand 12-volt and 120-volt electrical systems and branch wiring, it’s best to let an electrician do this part of the restoration for you. Let’s see how the wiring went.
There are a couple of things to consider when planning your branch circuits for a restoration project like this. You always want to keep the voltage drop less than 5%, and the maximum continuous load on your main and branch circuits should never exceed 80% of the circuit breaker’s rating. Before I ran the wire, I calculated the amount of amperage that will be on our branch circuits at any given time to make sure it was safe. The wire size also needs to be considered based on the length of a run and the amperage. Normally, for 15 amp circuits less than 25 feet, you would use 14 gauge wire. And for 20 amp, you would use 12 gauge wire. Another factor for wire size is where you locate the power center. That determines the length of your runs, which in turn, determines the wire size. It’s not really crucial with the short runs on a trailer like this, but on a bigger, longer trailer, you would need to consider that as well.
Now, I want to run our 12 volt wiring. Twelve volt wiring needs to run for devices like the water pump, fan motors, overhead lights, the refrigerator, stereo, LP gas leak detector, and anything else you put in the RV that runs on 12 volts. After we run the wiring, we want to label it like we did the 120 volt wiring so when it’s time to connect it to our power center, we won’t be scratching our head.
Following our wiring diagram, we ran 12-volt and 120-volt wiring everywhere we needed it. The best way to run the wire is to drill holes through the wood studs and route the wire in the most logical way to get from point A to point B. After we located where the roof vents and air conditioner would be on the roof, we finished the rough in wiring and moved on to installing the new roof decking. We used lightweight decking on the roof because of our concerns about managing weight. With a single-axel trailer, you need to be more concerned about weight than with a tandem axel trailer. You only have two tires supporting all of the weight of the trailer as opposed to four. A lightweight roof decking works okay, but you need to be extra careful when you are working on the roof. This is what it looked like with the roof decking installed and all of the rough wiring completed.
All of the wiring terminated where our power distribution center would be located. We left plenty of wire to make our connections at the circuits. When you restore a trailer like this, you need to consider all of the parts you will need in advance and order everything ahead of time. Think about what you’ll be doing two weeks from now and order what you need then. Waiting for parts to arrive can really slow the project down. I was lucky and went to a sale where an RV dealer was going out of business, and I purchased lots of parts and materials that we can use in this restoration project at a good price. Saving money anywhere you can really helps.
Dawn Polk: Oh boy, I sure hope he knows what he’s doing.
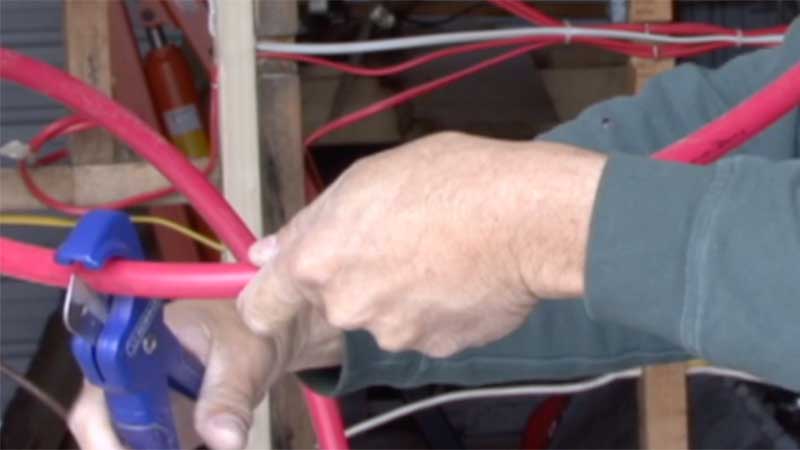 Mark: Now that we’ve got our wiring roughed in, this is a great time to rough in some of the plumbing. I went to my local hardware store and picked up some PEX plumbing supplies. And the plan today is to run some hot and cold water lines throughout the trailer. I’m not going to install any fittings today until I get some of the components in and I know exactly where I have to route some of the additional water lines. I did the same thing I did with the electrical with the plumbing. I drew a simple diagram to give me some idea
of exactly where I expect some of these components for the plumbing system to be located.
When it comes to interior paneling for an RV, there’s lots of choices, but I wanted to stick with that vintage, natural wood look, so what I did was I purchased some 4×8 hardwood paneling that I’m going to stain with the stain that’s got a polyurethane in with the stain. It’s going to be a lot of extra work, but I think it’s going to be well worth it in the end. Maybe I can get Tyler to help me with it.
I stained one sheet of the interior paneling with a wood stain, but after looking at it, I was concerned it would look too dark inside the trailer when it was all finished. I still wanted the vintage look of old weathered wood, but at the same time, I wanted it to look lighter and brighter inside. I found some white country wood stain on clearance and had an idea that I could stain the panels white and then add some color over the white, sand it all back off, and get the look I was after. At some point in time, you need to make this project your own because at the end of the day, you’ll be the one using and enjoying the trailer.
The next step was to install our vinyl flooring. There’s more than one way to install vinyl flooring. If you have the old flooring like a piece of carpet, you can use it as a template. We just cleaned the floor really good, spread the adhesive with a notched trowel, and laid the vinyl down. We did one half of the floor and then the second half, and trimmed the vinyl to fit.
I feel pretty good about where we are with the restoration, or should I say rebuild project. Join us next time when we start building our new interior floor plan, and work on the plumbing in the bathroom and on the holding tanks.
Happy camping,
Mark Polk
To learn more about how to use your RV,
check out our e-book training courses and video training courses available at rvonlinetraining.com
Happy RV Learning,
Mark Polk, your trusted source for RV education
RV Education 101