

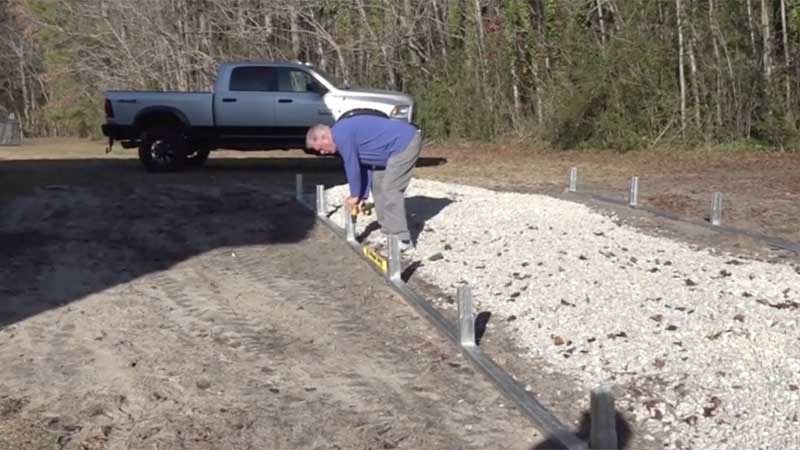
With the ground level, lay out the base rails. They should be spaced building with the part from outside to outside dimensions for your structure. Join all the base rail components as shown in the instructions. Keep the swag joints even in length and fasten the swag joints using two self-drilling screws per joint on top of the base rails. Position the base rails the correct distance apart from each other.
 Measure across the diagonals to check for square. This is an important step. So adjust the base rails until the diagonal dimensions are equal. You have the option to have a concrete slab poured or to anchor the base rails to the ground using concrete piers. To save some money on the project, I decided to anchor the structure to the ground using concrete piers. Mark the location of the base rails and the anchor holes on the ground and move the base rails aside. Dig holes at each anchor point for the concrete. Check with your local building codes for frost line depth.
Move the base rails back into position and check the measurements again. Now drop a versa tube 30-inch rebar into each hole. Mix and pour concrete into the holes up to ground level. Double check your measurements prior to the concrete setting up. We let the concrete set up overnight and everything looks good. Today our goal is to get the roof and wall frame assemblies put together. Let’s get started right now.
Roof/wall frame assembly.
 On the ground, assemble one peak, two rafters, two side posts, and two height extensions if required. Before you fasten the joints with screws, take a measurement across the top and bottom of the assembly as shown in the instructions. It is very helpful to drive stakes into the ground at the width of the building and use them to set the dimension at the bottom of the assembly. Now fasten the joints with number 12 by 3/4 inch self-drilling screws. Four screws in the peak of the rafter, inside post rafter joints, and two screws in the height extension joints if required. You can use the first assembly as a template to assemble the remaining roof/wall frame.

Installation of corner brackets.
Corner brackets must be installed on all side post corners. Make sure it’s flushed with both surfaces and fasten the bracket on both sides of the assembly with four number 12 by 3/4 inch self-drilling screws per side, marking the hat channel placement on the frames ahead of time. Once you have the trusses assembled, take time to stack them on top of each other, ensuring that the top of all the frames are squared up and all the joints are lined up. Now refer to your care package that was emailed to you for the on-center spacing of your hat channel. First, mark the outside locations at the eave corner. Next, mark the on center spacing according to your care package. Use the on-center marks and center the hat channel vertically as shown in the illustration. Then mark a line across the trusses, locating both edges of the hat channel.
Installing roof/wall frame sections to the base rails.
 We’re using a ladder to assist us because there’s only two people raising the wall sections. Start at one end of the building and place a roof/wall frame assembly on the first base rail vertical pin. Repeat this assembly until all roof and wall frame assemblies are installed.
Fasten the vertical joints with two screws each. Keep the screw heads away from the outside of the building where sheet metal may be installed.
Squaring up your frame.
To do this, first check the front and back roof/wall sections to make sure they are plumb side to side. If adjustments must be made, you can drive a wooden or metal stake into the ground about 8 feet from the building and use a motorcycle strap or ratchet strap
to pull the side posts into plumb. Place a clamp on the side post and attach a strap above the clamp. When the front and back sections are plumbed side to side, tie two strings from the front side posts to the backside posts at the bottom and top of the bend radius. These strings will let you see which sections are high, low, or out of plumb.
Installation of hat channel purlins on the roof.
If you recall, we measured and marked where our hat channel goes on the roof. So we’re going to install the hat channel purlins right now. Make sure that the end wall is plumb and attach angle brackets from the end wall side post to the lower portion of the next frame section. Place a brace on both sides of the building. With the back wall supported, you can measure and note the distance from one frame to the next at the base rail and use that dimension to position the frames at the top of the building as you install the hat channel purlins. Attach the hat channel to the frame with number 12 by 3/4 inch self-drilling screws. See the illustrations in the instructions for purlin locations and joint details.
Installing horizontal side metal panels.
If any sheet metal was being installed on the eave sides of the structure, installation of said eave metal will need to be completed
before roof metal installation begins. Start your first run of sheet metal panels at the eave corner of the building. Start at the back of the building. The sheet metal panels have an underlap and an overlap edge. The underlap edge is a complete rib with a small flange. The overlap edge is a partial rib. The underlap edge will always be placed to the top, and the overlap edge to the bottom. Use number 12 by 1 inch painted self-drilling screws to install sheet metal panels.
Installing eave trim on horizontal sides.
The eave trim for your building is 3 by 3 1/2 inches by 10 feet long. Start the application of the eave trim at the back of the building. Place a 10-foot piece of trim at the eave of the building as shown in the instructions. Square the trim to the building and attach it to the top of the hat channel with number 10 by 7/8 inch panhead self-drilling square drive screws. The end of the trim should be flushed with the corner trim as shown in the instruction. Repeat on the other side of the building. Installing sheet metal panels on the roof. Place the first panel at the back of the roof. Position the overlap edge of the panel to the rear flush with the carport frame. The lower edge of the panel should be positioned 2 inches or 3 inches from the lower edge of the first hat channel or the edge of the corner bracket depending on the length of the panel. Clamp the panel in place once you have it in position. Attach the panel to the hat channel with painted number 12 by 1 inch self-drilling screws with rubber sealing washers. Continue installing panels as you did the first panel. Repeat the assembly for the other side of the carport.
Installing the gable trim.
Cut two pieces of 10-foot trim in half. Place the screw about every 24 inches into the front surface of the trim. Repeat the assembly for the other side of the carport. Now, from another piece of 10-foot trim, cut two pieces 42 inches long to create the peak trim pieces for a 12 foot wide carport. Clip each piece in the front center up to the corner and then clip the back flanges to the bend. Then bend the trim to create a gable peak piece of trim. Fasten the trim to the frame with the same screws you used for the roof panels.
Installation of the ridge cap.
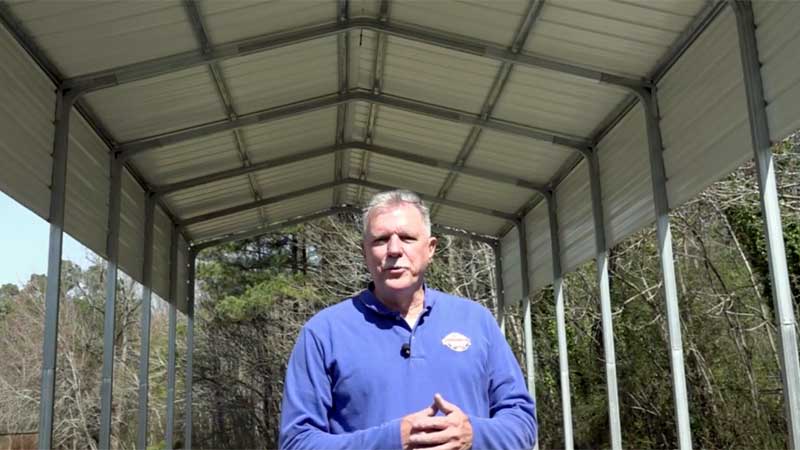 The last step of our project is to install the ridge cap. Follow the instructions that came in the installation manual to install the ridge cap properly. That’s all there is to installing your VersaTube RV carport. If you get a couple of friends to help, it can be done in a couple of weekends. If you don’t feel comfortable installing it yourself, you can find a local builder who can do it for you. For more information on this RV carport or other DIY steel building kits, visit www.versatube.com.