Mark: Welcome back to part 3 of our camper van conversion dubbed the Ram Camp project. Today the plan is to insulate the interior of the van, install the walls, ceiling, and floor. Let’s get started. Prior to starting on the interior walls, ceiling, and floor, I had to finish all the welding on the interior of the van. I already welded sections of square tubing in that will support the bed’s plywood base, and I welded the brackets in to support the gym locker that will be used for our overhead cabinet. Towards the rear of the van, there is a section where the metal ribs are spaced further apart, so I welded additional metal bracing in on both sides. This gave us more metal to attach grip to so the finished walls are securely attached. Then I welded a small section of channel iron on the floor upside-down to route and protect the 12-volt, 120-volt wiring going to the base cabinet located behind the front seats.
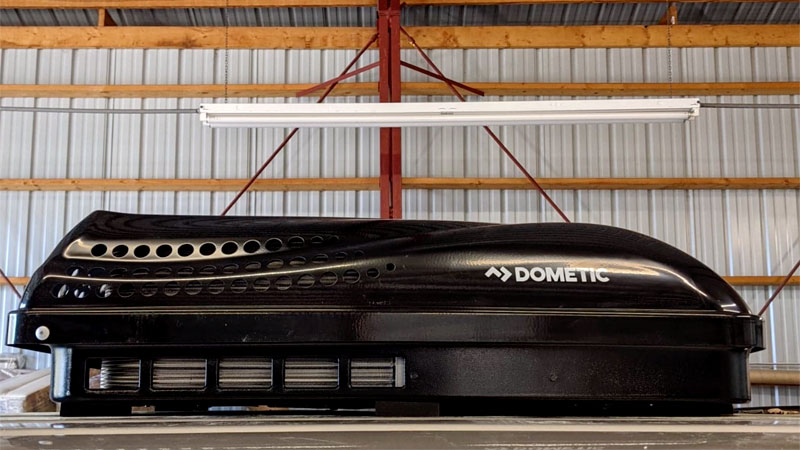 The only welding left on the interior of the van is to fabricate a roof support system for our Penguin II roof air conditioner by Dometic. Standard RV roof air conditioners require a 14X14-inch opening in the roof. We had to determine where to cut the opening in the roof and make sure there’s sufficient room on the roof for our solar panels. After I cut the opening in the roof, there is no turning back. I mark the roof opening with masking tape and cut it out using a jigsaw. Next, I needed to fabricate the roof support system for the AC unit. I thought it would be better and stronger if I used square metal tubing welded in between two of the factory roof braces. I cut, grinded, and welded the metal roof bracing in. And after test fitting the piece to make sure it fit, I welded it in the van. With the bracing for the air conditioner finished, it was time to install the AC unit on the van’s roof. We needed a lightweight, low-profile, high-performance air conditioner, and this Penguin II by Dometic is just what we we’re looking for. This model also has a heat strip that will take the chill off inside the van in colder temperatures.
The first step was getting it up on the newly painted roof without damaging it, us, or the AC unit. We decided to leave the air conditioner in the box, so we don’t damage the gasket getting it on the roof. The air conditioner has a thick gasket that is centered around the frame opening. We already have our 120-volt wiring routed to the AC unit. Our ceiling for the air conditioner unit is between 1.5 and 2 inches, so we needed to cut the duct divider according to the instructions. Next, we installed the ceiling plate and the duct divider. Now we can hand start and tighten the four bolts that compress the gasket and give us a good seal at the roof opening. Just follow the installation instructions to properly torque the bolts. This is all we need to do with the AC unit for now.
Now we can install our solar panels on the van’s roof. We need to route all the wiring through the roof and down to the floor at the rear of the van prior to installing the walls or ceiling. The first step was determining the best placement for the two solar planes on the roof. We used the cardboard box the panel came in to help decide the best fit. With the placement figured out, we installed the feet on the panels and carefully positioned them on the roof. After drilling the holes, I used butyl tape on the bottom of the feet and bolted the panels to the roof. Next, I connected the two panels together with the quick connects. Then it was time to route our positive and negative cables through the roof and down to the floor in the van. After drilling the hole, I filed the rough edges, and we pushed the cable through the roof and routed it to the van’s floor. I put electrical tape around the cables, where they went through the roof as added protection. We will seal the cables and the hole in the roof when we get our roof plate.
Dawn Polk: Before we insulate the wall, ceiling, and floor, we need to install furring strips that we can attach our wall and ceiling panels to. We are using 1X2 boards as furring strips, so we will attach the furring strips to the metal ropes using screws. The walls and ceiling will attach to the furring strips with a staple gun. One concern is that all the wiring and plumbing is protected from any damage by screws, staples, or sharp edges. So, we will keep a close eye on that.
 Mark: The next step is to insulate the walls, ceiling, and floor. For the insulation, we chose this Havelock Wool product for several reasons. One reason is for moisture management. We know there’s going to be condensation in the van. And unlike other insulation, wool can naturally absorb moisture and retain its high insulation properties. The 2-inch wool backs have an R value of 7, and Havelock Wool is excellent for sound absorption. It’s also a renewable, sustainable product, and it’s easy to use. You just measure, cut, and install the wool insulation. We can insulate the entire van with 2.5 100 square foot boxes of Havelock insulation.
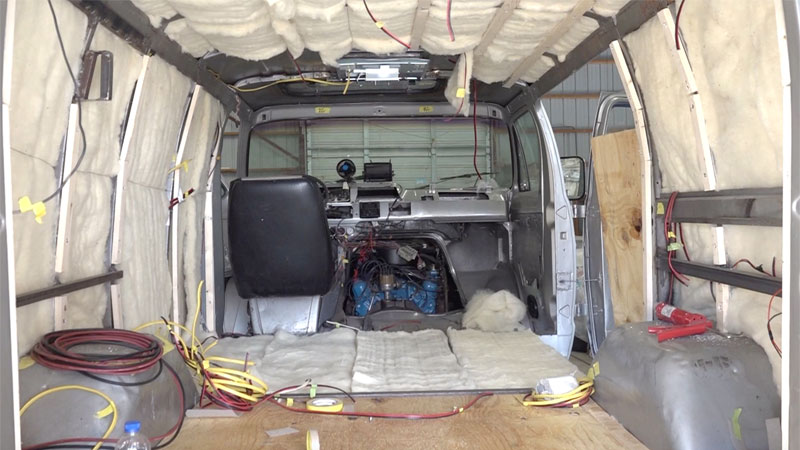 We installed the insulation on the walls, the ceiling, and as much as possible on the floor. A Ransom thin gauge wire through the ribs on the walls and the ceiling to help hold the insulation in place until we got the finished walls and ceiling completed. Dawn made sure that not one inch in the van was without insulation.
Dawn: With the insulation finished, we are going to install a plywood underlayment for the finished floor. We’re using plywood, and we will install it from the back of the van to the front where the cab carpet ends.