
If I was asked what the biggest maintenance related problem with RVs is, my response would be water damage. When you consider all the flexing and movement RVs endure while traveling down the road it’s no wonder the seams and sealants start leaking. To make matters worse, most water leaks originate at the RV roof, and as the old saying goes “out of sight, out of mind.”
 You can’t repair a leak if you don’t go on the roof and inspect for leaks. Periodic roof inspections and maintenance can literally add years of life to your RV roof, and the good news is lots of RV roof maintenance is easy for RV owners to do.
Caution: Exercise caution whenever you go on the RV roof. A fall can result in serious injury or worse. If you are not comfortable working on the RV roof have a qualified RV service facility inspect and maintain the roof seams and sealants for you.
Today I want to discuss the correct way to apply new lap sealant to seams on your RV roof.
 To get many years of reliable service from your RV roof it’s important to properly maintain the roof. RV roof preventive maintenance includes inspecting roof seams and sealants and applying lap sealant wherever a potential water leak exists. If there is a way for water to penetrate the sealants it will find it, so inspecting the roof sealants periodically only makes good sense.
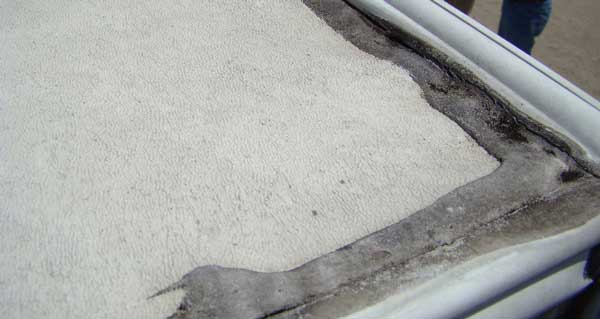
The key to inspecting sealants on your RV is to look closely for any cracks or separation in the old sealant where water could penetrate the surface. To do this properly I recommend getting on your hands and knees for a thorough evaluation of the old sealants. Look closely at the old sealant, and touch the sealant to make sure it is securely adhered to the surfaces. If the old sealant is lifted or separated from the surface of the roof and can easily be removed, go ahead and remove it, otherwise it’s best to leave it alone and seal over top of the old sealant.
 Prior to resealing any sealants on the roof, you need to thoroughly clean the old sealant, and the surrounding roof surface so the new sealant can adhere to the surface. I use Dicor Rubber Roof Cleaner to initially clean the area, followed by some denatured alcohol on a clean cloth as final preparation.
Note: Do not saturate the roof’s surface with denatured alcohol, and make sure you use the correct sealant for the roof’s surface. Consult your RV owner’s manual or local RV dealer for the proper sealant.
With the area you are sealing clean, and any loose or separated sealant removed, use a standard caulking gun and run a bead of the correct caulk over the area you are resealing. If you are sealing a crack or separation in the old sealant you don’t need to apply as much sealant as you would for a new application. It’s best to apply caulk during dry weather, and warm temperatures help the caulking set-up and adhere to the roof surface sooner. In 50 to 70-degree temperatures the lap sealant will skin over in about 5 minutes and should be waterproof in about 4 hours, so it’s best to make repairs when no rain is in the forecast.
Periodic roof inspections, and resealing roof seams as required is vital to preventing water leaks and costly water damage repairs.
To learn more about maintaining your RV check out our RV Care & Maintenance e-book training course and other video training courses available at our RV online training site and check out the RV video training courses and RV e-book training courses we have to offer.
Happy camping from Mark Polk of RV Education 101