Dry camping, or boondocking, is really popular these days among our RVing fraternity. And because of that, the popularity of solar charging systems for your batteries is also gaining. When you’re out there boondocking, you don’t have any hookups. A solar system keeps your battery up to snuff, and you don’t run out of power. We’re gonna tackle a Go Power Solar Elite Charging System installation on this Palomino truck camper. It’s a fairly small camper. There’s not a lot of room inside. There’s plenty of room on the roof.
It includes two 190-watt solar panels for a total of 380 watts, which is a lot of power. And the system also includes this Go Power 2000-watt inverter, which also has 100-amp charger built in. So, we’re gonna have to find a spot to put this inside. We think we’ve got it figured out. We’re gonna give it a shot and find out.
Now, the kit, in this case, includes just about everything you need. You’ve got your large-diameter cables for running the battery power to the converter-inverter and the inverter control panel that mounts in the cabinet. This is the solar charge controller, which regulates the voltage coming from the solar panels to charge the battery. This is in the kit. There’s just about all the other wiring hardware, everything else that you need to do this installation. Go Power advertises this as a set that can be installed by a user at home. Well, we are at a user’s home; and other than for the fact that we’ve got a wonderful rainy day here in Indiana, we’re hoping that the rain stops long enough for us to get the work done up on the rooftop, and we’re also gonna go inside first and see about getting this converter mounted and modified as needed.
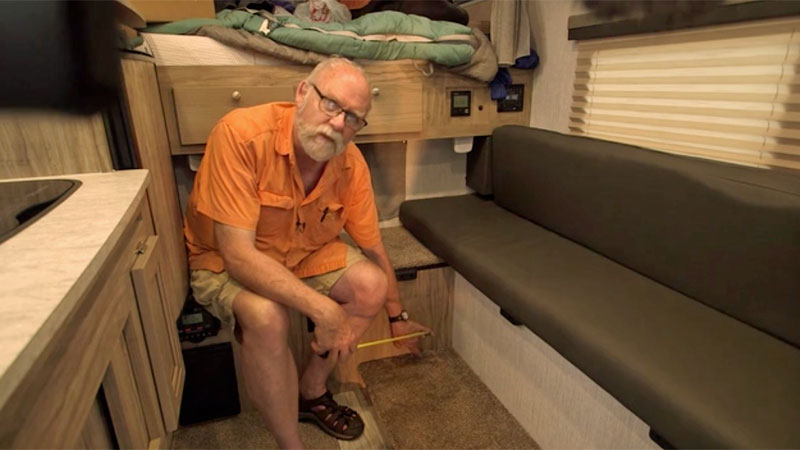 Jeff: We did a survey of the interior here, and there’s really only one reasonable location–and this may even not be reasonable, but we’re going to give it a try anyway– where the inverter will fit, and that is the cabinet that I’m sitting on is the cabinet that has the battery on one side, the water tank on the other, and some various miscellaneous wiring inside. Now, you know, so, the inverter cannot fit in there; however, down here on the floor, underneath where the table sits, there’s kind of a little storage area. And we don’t need all this storage area for storage. So, the plan is we’re going to remove this little cabinet piece from the rig and modify it so that the inverter fits in this far corner of the cabinet, and then take the carpeted top, move it up to the top of the converter or the inverter, and then that gives the inverter access through this panel to the wiring on the inside near the battery.
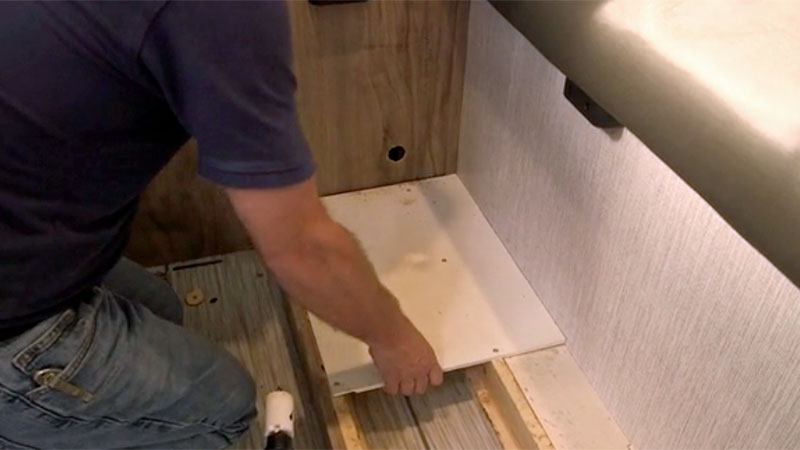 Jason: So, down here for the inverter module, all 39 or so pounds of it, we cut this piece of plywood that we had laying around, cut it to shape, screwed it down to the actual structure, so we have something good and firm for the inverter not to slide around or damage anything.
Jeff: We framed a simple plywood box, covered in paneling to match the camper interior, to house the inverter. We think the finished inverter box installation looks pretty good in the camper here. We’ve got ventilation holes on the sides to allow cooling for the inverter; can lift up the lid if we need to allow even more air circulation for more cooling. Two dedicated plugs on the front, powered strictly by the inverter for video battery charging and so on. And this provides a really great additional step going from the floor up here to the cab over bunk. Now, we also have, we still have access to the storage down underneath here for long, skinny things, and this is the auxiliary breaker panel for the two circuits to come out of the inverter.
The AM solar guys did a really good job on the wiring in the compartment. The Go Power solar charge controller mounts very nicely on the frame that we built for the surface of the wiring cabinet here. We put it on the outside frame just to avoid having to recess it inside and get any more complications inside the box here. The holes drilled around the edge provide a little air circulation to keep it cooled. We think the installation works very nicely.
Now we’re back in Oregon. The weather is great. We’re headed up to the roof to tackle the solar panels. One of the more challenging aspects of solar panel installation can be finding space on the roof for the panels. There’s so many appliances and gadgets up here nowadays that some of them are pretty crowded, but we only have the three vent covers and the factory stock OEM solar panel to work around. And, of course, the best thing to use is the cardboard box that the solar panels come in. This is a little easier than wrangling the panels up here. We have room away from the vent cover, just short of the joiner, the junction box here for routing the power down inside the vehicle, and we’ve got an equal amount of room there on the other side of the camper. Looks like it’ll work out great. On to step two.
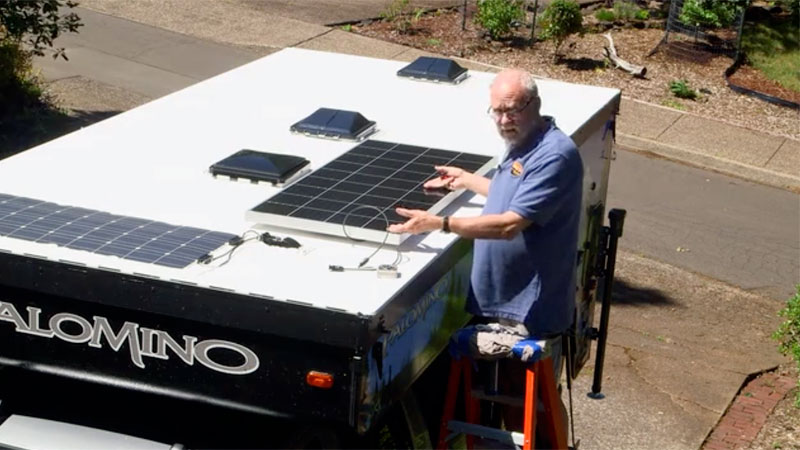 First up is installing the mounting feet on the panels. We bring the panel up here, kind of lay it down, face down at first. Got the cables loose. So, we carefully turn it over, without dragging any of the little mounting tabs on the rubber roof. There we go. Looks like, yeah, right around six inches, right around six inches; close counts. I’m using a grease pencil, make a little mark on the roof where our front two mounting tabs will be, because when we turn the panel over again and install it, there’s gonna be sealant on the bottom. So, we want to just install it, set it down, and not move it all over the roof with the sealant on it. Here we turn the panel back over and ready to clean the surface and finish the install. Self-leveling sealant and adhesive helps prevent leaks around the mounts.
This is so much easier with two people. God, I was dreading doing this at home. This is really a lot easier like this with two people. just hold it a second. It’s gonna want to slide around a little. Technically, you probably shouldn’t need to pre-drill these holes, but I always pre-drill holes a little bit anyway. Finally, just put a little glob of the glue, the sealant, right on the screw heads just to make sure. The final step in the process is finishing up the rooftop wiring. Now, we started with two Y connectors that allow you to connect two solar panels into one input for the input box here. Now, the passenger side panel is a little bit too far away from the junction box. So, we picked up these two 18-inch extensions for the 12-volt input. We’ll kind of loop them around here. Yeah, we can fasten this down. The idea behind these little tie-downs, of course, is because you don’t want to have the cables rattling around on the roof and putting stress on the connectors, on the panels, or the connections while the whole time you’re driving down the road.
This cable here and this short one are the cables from the original OEM panel that was installed, but we kind of bypassed that one in favor of the Go Power panels. So, we’ll also fasten this down just to keep it in place in case someday we want to tap it into the whole system, but we’ve got enough amperage going with the Go Power panels that I don’t think we’re gonna need to use the original panel as well. The sealant not only helps to secure the pad to the roof like, you know, glue. It’s kind of an adhesive as well, a really good adhesive, in fact. It also– you put a little glob on top and it helps keep the wire from rattling around in the zip tie, which is kind of neat.
Well, now you’ve seen how we installed this Go Power Solar Charging System on our Palomino truck camper. It’s a little bit of a job. There’s no lying about that. But any enthusiast who enjoys tools and knows a little bit about working with this sort of thing can do the job on their own RV.