Today’s pickups are typically well-equipped for camper hauling duty. Even with the correct-sized pickup, when you plan to haul a slide-in camper, there are a few items you can add or improve on to further enhance your rig’s highway manners. A camper’s high center of gravity means the truck will be affected more during some driving maneuvers, and some select accessories can make a big difference. We took on a project to equip our 2021 Ram 2500 truck for a modest-sized camper hauling duty. First up is a mandatory accessory: the tie-downs that secure the camper to the truck. Other hardware may be optional, but every camper setup needs these, and different models are available.
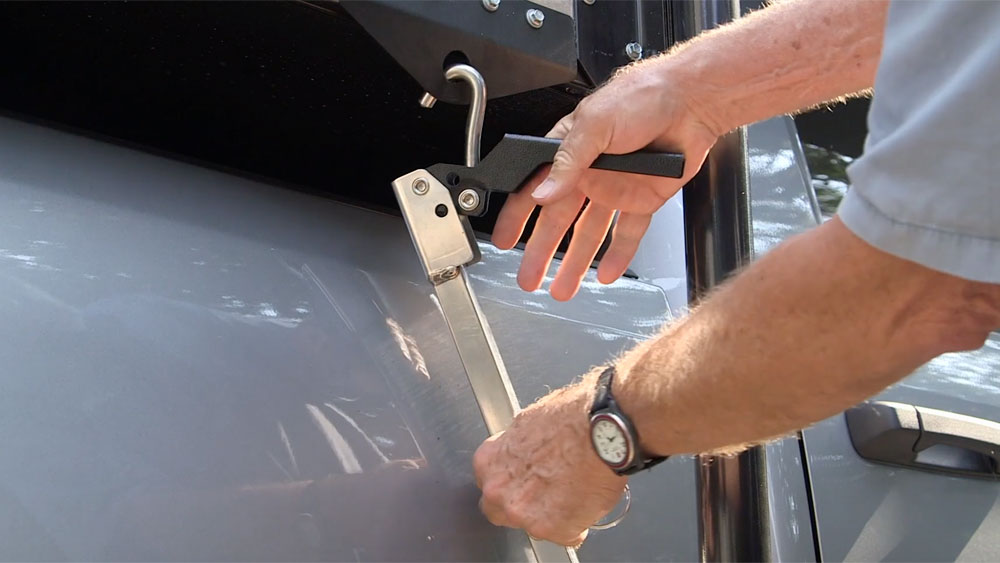 The Torklift brand of frame-mounted tie-downs cannot be beat. These are heavy-duty steel, plated for corrosion resistance. And most of the installs involve using the factory stock holes that are already in the frame. So, it’s usually a bolt-on installation; once in a while it may need some drilling, but most of them are bolt-on installations, and they’re available for a wide range of pickups, 1500 size models all the way up to 3500 and more and all years and so on. So, when you’re normally driving down the road without the camper, you have just this part on the frame, and you don’t even see it outside the body. When you go to put the camper on, you slide this extension tube in place, and you have the tie-down loops on the outside here, and these are the part that sticks out beyond the truck body. So, this can be removable. This part stays with your truck. With the tie-downs mounted to your truck frame, you have to figure out a way to attach the camper to the tie-downs. For that, we once again turn to a Torklift product. This is called their FastGun Tiedown. The top end hooks onto the loop on the camper. The bottom end goes into the end of the frame-mounted bracket. You attach it, and then you clamp this down. That adds a little bit of tension to it. And there’s a spring-loaded feature in here so that when it’s clamping, it has a little bit of spring tension on it, so it isn’t exactly a solid mount, but it has a little bit of flexibility. They’re available in several different finishes. This one happens to be poly-stainless steel. It’s also available in a kind of a gray gunmetal and in a black– kind of a wrinkled finish. Again, done for corrosion resistance. You can see why it’s called FastGun. Hook it in, clamp it down, and you’re good to go after you put in your safety pin.
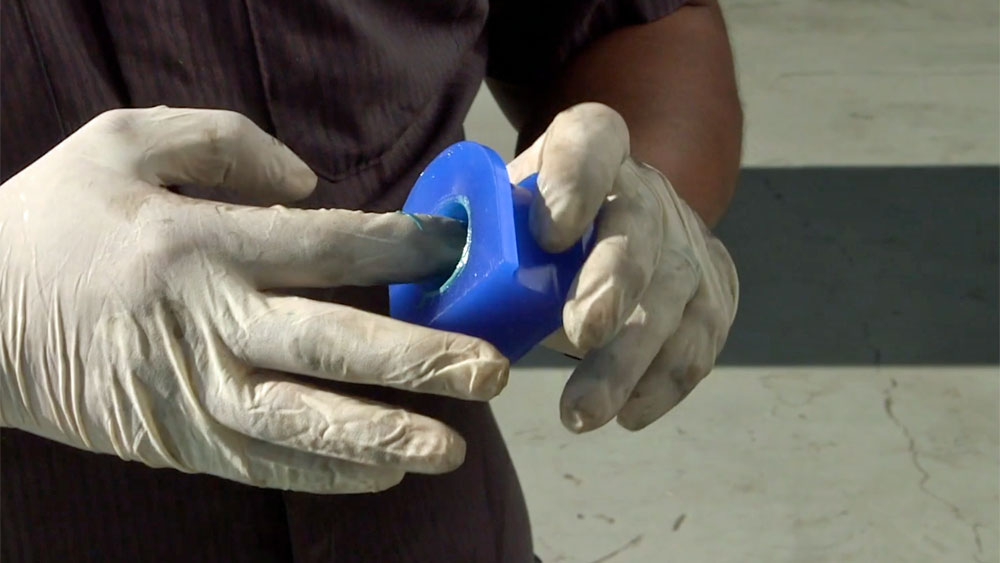
 To help support the camper weight, we chose SumoSprings, solid rubber suspension aids. These are an interesting alternative to standard airbags. We went to B&G Automotive in Eugene, Oregon, where shop foreman Brandon Evans tackled the installation. SumoSprings look like airbags. They’re kind of a little rubber donut-looking deal, and this fastens to the rear suspension and the front suspension. And what these are is instead of being inflated, they’re solid rubber. They’re more or less urethane with air impregnated, you know, tiny bubbles like a big sponge, only a lot stronger than that. And the principle here is that you never have to inflate them or care about whether they’re inflated to the right pressure or not. That means that you have a little less adjustability, but you also don’t have to worry about something going underinflated. For this 2500 series Dodge Ram, for example, they’re available in anywhere from 1500 pounds up to 5000 pounds. Now, this one is the middle of the range – 3000 pound capacity. We’re going to be hauling a fairly lightweight camper on this, so we didn’t need the maximum capacity. Now, this one is designed in two pieces. This part fastens to the axle. This part goes on the frame. And the principle here is while it’s not loaded, when you’re just running around solo, the axle is free to move relative to the frame, and it doesn’t really provide any change in your ride or handling. Now, as the weight goes on the vehicle, the springs come into effect, and they help to support that weight and provide cushioning and a little bit of support and, you know, help keep things a little bit steadier, maybe even. So, this is something we’re gonna give a try. We’ve never done the SumoSprings before. We thought we’d give them a shot on this truck.
Now, the front springs go on the front axle, because there is some of the weight, of course, that’s carried on the front axle, even with the camper in the bed. So, these guys, more or less, replace the original bump stops on the front axle. And installing them, you simply pry your old bump stops out, pop these in place, and you’re good to go. The installation could not be much easier.
 Every new vehicle comes equipped with shock absorbers. Some of them are upgraded performance models. Most of them are just kind of run-of-the-mill shocks that do what they’re supposed to, which is damping out road oscillations. Fortunately, upgrading your shock absorbers is one of the easiest things you can do
when you’re outfitting a truck for camper hauling duty. And it’s hard to recommend anything better than Bilstein Shocks when it comes to upgrades like this.
We’re nearing the home stretch on our camper hauling upgrades for our Ram truck. The Torklift camper tie-downs and SumoSprings are in place, and next up is finishing the Bilstein shock absorbers. So, let’s get back to the project.
Bilsteins are engineered in Germany, so they’ve got that going for them. They’re a monotube design, the gas pressure chamber down at the bottom, and what this does is help to prevent cavitation, or foaming of the oil, so to speak, when the product heats up a little bit. Bilsteins are available for just about anything with wheels on the road, including all kinds of trucks, tow vehicles, and so on; motorhomes, even. Each shock is specifically valved and engineered with performance characteristics to match the type of vehicle. You’re gonna need a different shock for a 2500 series pickup as opposed to, say, a family car. So, we’ve got Bilstein shocks that are going on the truck, and this is one of the easiest things you can do to improve your ride handling, tire life. Apparently, it helps to improve your tire rubber mileage because it helps the tires to stay on the road a little more effectively, and it’s one of those things that can make a, well, pretty fair difference in the way your vehicle rides and handles, and they last a long time. So, we’ll take a look at the installation.
Depending on the setup, you may not need to remove the wheels and tires for this job. But Brandon pulled them for a convenient access. Most Bilstein Shock installations are easy, bolt-in operations. The worst part of the job is getting access to the fasteners due to the crowded engine compartment or chassis spaces. The stock shocks come out and the new ones go in. It’s a not-too-complicated process. Snug down the fasteners to the recommended torque, and the Bilstein installation is finished.
Last, but far from least, is the replacement upgrade rear anti-sway bar from Roadmaster. The stock truck comes with about a five– or 7/8-inch diameter bar. This one is 1 1/8-inch diameter. It doesn’t seem like much, but it doesn’t take much diameter increase to dramatically increase the amount of roll stiffness. And they call this a sway bar, but technically it’s an anti-roll bar, because when the body of the truck goes around a corner, where you get a crosswind, then the body’s gonna rock around a little bit. The bar helps to resist that because the bar is mounted on the axle. The ends are mounted to the frame. So, it resists that twisting and helps to keep the body more straight and level, but it doesn’t affect the suspension or ride because it still allows free vertical movement of the suspension. Now, the kit includes new end links, new mounting components with urethane bushings, which are a lot stiffer and less squishy than rubber, so they hold things a little stiffer,
and, of course, a pile of parts. Now, in the event you are going to be hauling something like a really big hard side truck camper that’s tall, heavy, wide, and is going to present an awful lot of sway or roll, Roadmaster does have a larger diameter bar that will work for that. But our fold-down truck camper doesn’t present that much of a top-heavy load, so this 1 1/8 inch will do the job. So, let’s install it.
Once again, we turn to our friend Brandon at B&G Automotive in Eugene to perform the sway bar installation. This job on this truck is truly a bolt-in operation, using the same mounts and so on. The stock sway bar and end links are removed and set aside. The new Roadmaster end links are much stronger, and the new hardware fits like a champ. Brandon had some advice regarding the bushing grease included with the kit.
 Brandon Evans: So when you’re doing this, it’s really kind of a “less is more” kinda thing. You put way too much grease in there, all that dust and grime from the road, it’s all gonna collect on there, and it’s gonna foul up the bushing, and then you’ll have dirt and grime in there, and that’s gonna wear your bushings out faster. So, definitely, less is more.
Jeff: Installing the new sway bar was less than an hour’s job, including pauses for setting up video angles. With the new Roadmaster sway bar installed, we had no bad effects on ride quality and more control in corners and on the road. We call that a winning combination. A few select pieces of hardware can make your camper hauling time safer and more relaxing on the road.