
Hi, I’m Mark Polk with RV Education 101. Today, I want to discuss one of the most important safety devices in your RV, the carbon monoxide detector or CO detector. Carbon monoxide is called the silent killer. That’s because CO gas is invisible, odorless, and it’s deadly.
We just took the RV out of storage, and I heard the CO detector chirping about every 30 seconds. That typically indicates a weak or dead nine-volt battery. We installed a new battery and it still chirped every 30 seconds. When a safety device chirps like that, a light also illuminates. And if you look in the instructions for the device, the color and number of times it illuminates will help troubleshoot the problem. Ours flashed two red lights every time it chirped. On our model, two red lights flashing indicates the detector reached the end of its life and needs to be replaced, so that’s what we’re going to do right now.
Something lots of RV owners and homeowners are not aware of is CO detectors and other safety devices have expiration dates.
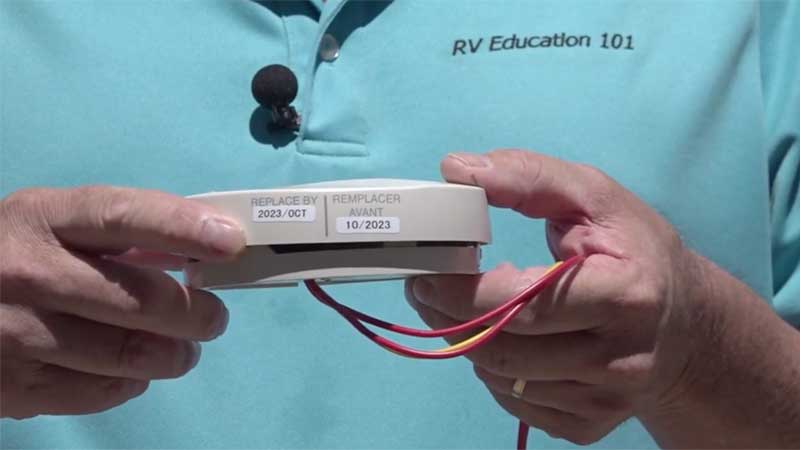 Ours was listed as October 2023, but it didn’t last that long. That is why it’s important you not only know what the expiration date is, but you test the device every time you use your RV. I look for the expiration date on all of our safety devices and write it on the front cover so it serves as a constant reminder. When you replace a CO detector, it’s important to understand a replacement must meet standards for use in RVs. The reason is it’s not in a climate controlled environment like your house. There can be wide variations in temperatures, and the device needs to be made for that.
Our CO detector is hardwired into the RV’s 12-volt system, and we had a 9-volt battery as a backup. I like knowing that if one power supply failed, there was a backup. So, I searched the Internet for an RV model that works on both power supplies. I couldn’t find any except what looked like a used model on eBay. I found 12-volt hardwired models and I found 9-volt models. I opted for the hardwired model since the RV was already wired for it.
 Let’s install the new model right now. The old model mounted on the wall covered the hole where the wiring is. This model has a flush mount design. After marking the size on the wall, I cut it out, making sure no wiring was in the way. The old model had a plug that plugs directly into the RV’s 12-volt system. The new one did not have a plug, so after testing the voltage at the RV plug, I cut the plug off the old detector and spliced it into the new detector. You need to make sure you have good connections and tape everything with electrical tape for safety purposes. All that is left to do is test the new unit and then mount it on the wall.
It’s not only important you have a properly operating CO detector, it’s important everybody staying in the RV understands what CO poisoning symptoms are. Carbon monoxide symptoms are similar to flu symptoms,
but without the fever. Symptoms include: dizziness, vomiting, nausea, muscular twitching, intense headache, throbbing in the temples, weakness and sleepiness, inability to think coherently. If you or anyone else in the RV experiences symptoms, you immediately get to fresh air. If the symptoms persist, seek medical attention immediately.
Check all of your RV safety devices before each trip, then head out on an RV adventure with peace of mind knowing if something does happen, you will be alerted to the problem with time to react.
To learn more about your RV, take a minute to visit rvonlinetraining.com.
Happy camping from Mark Polk of RV Education 101