
Mark Polk: Thanks for joining us, and welcome back to our ’67 Yellowstone restoration project. Today, we’re going to start working on the new interior floorplan and the plumbing for our new holding tanks. We better get busy.
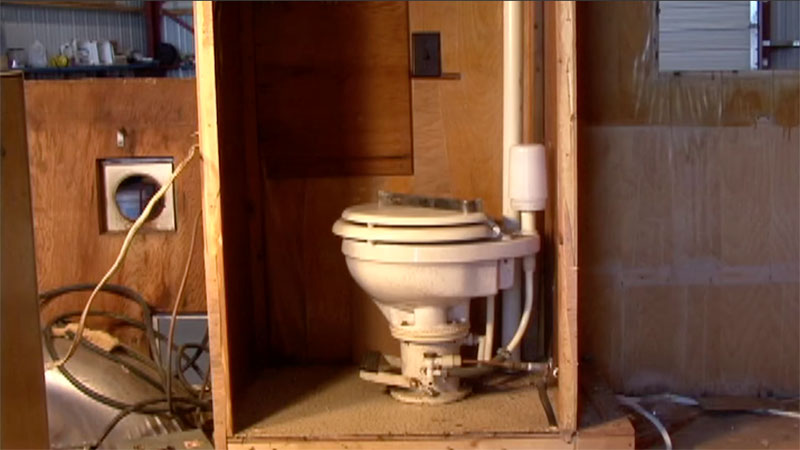 If you recall, the original bathroom was two feet by two feet, and it only had a toilet in it. Our plan is to nearly double the size of the bathroom so we can add a shower. In small spaces like this, RV manufacturers use what is known as a wet bath to save space. A wet bath is where the toilet, shower, and usually a sink are all located in the same space. It will be nice to have a shower in the trailer, but it required some framing to beef up the floor under the shower pan. After we framed the pan, we had a better idea of what needed to be done with our new holding tanks. Before we went any further with the shower pan, we needed to start framing the new bathroom walls. After I knew where the walls were located, I cut down the old dinette seat to fit in the new space. This is where the new power distribution center will be located, so I cut an opening out for that too.
Mark: The next project was framing a sofa at the back of the trailer. I decided to do a gaucho type sofa that pulls out to make a bed. That way, I had room under the sofa to install a new, fresh water tank and a 12 volt water pump.
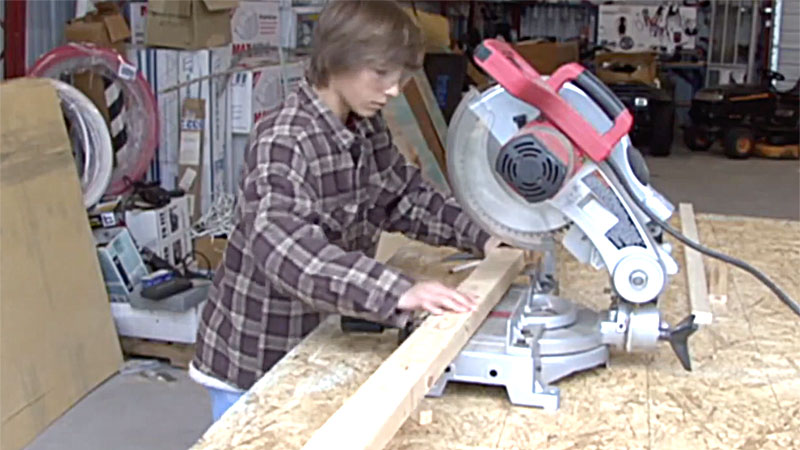 After I taught Tyler how to safely use a saw, I just told him what measurements I needed. He cut the wood while I framed the sofa and the bed.
Mark: It’s probably kind of difficult to see this, but what we have over here, we have our city water inlet, and we have our fill for the fresh water tank. We’re going to locate our water pump right down here next to the fresh water tank. What I have to do is I have to have a water line coming in from the city water connector, and tie that into our cold water line in the trailer. And then I also have to have the pump drawing water from the fresh water tank. And from the outlet side of the pump, I have to tee it into the cold water line so it can feed the entire system if we’re using our 12 volt water pump.
With the sofa framed, I took an old overhead cabinet I had, and converted it to fit in the trailer. This gave us some overhead storage space, and it’s a good place to install a stereo and speakers. We needed to add some additional upper and lower bracing behind the cabinet from the outside to support the weight of the cabinet. The additional bracing is what we screwed the cabinet into. What we’re doing right now is, we’ve got a bunk bed that goes up into the rear of the trailer. And we want to secure the bunk bed from outside before we put the metal on. So, we marked out line and want to pre-drill some holes, and then we’re going to put some screws through from the outside to really secure that so we don’t have to worry about an adult sleeping up there and being too much weight. What we want to do right now is when we drop our bunk bed down, this is our line where it’s going to rest. We’re going to put a brace here for the bunk bed to rest on. We’ve added support on the back of the wall to handle the weight. And I’m leaving this empty because I’m gonna put a wardrobe, a small wardrobe on top of the end table because there’s no place in the trailer that I can put any clothes. There used to be a wardrobe in the original trailer here, but that’s not gonna work with our configurations.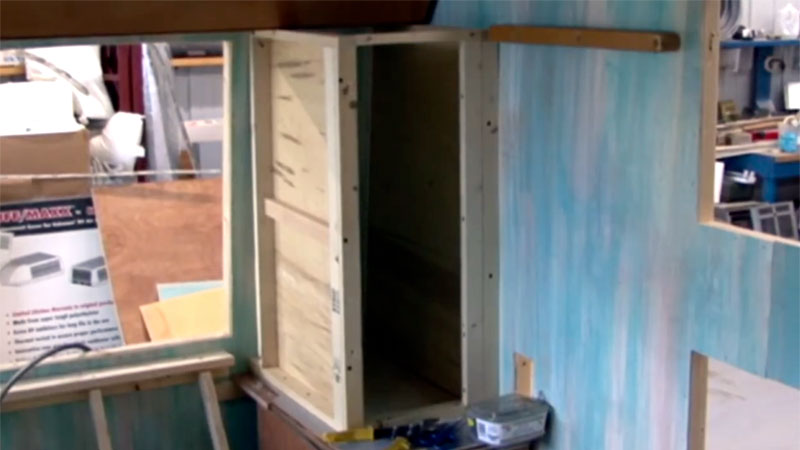 Okay, we have our bunk bed framed in. We’ve started framing our wardrobe. And now, what we’re going to do is take a look at our kitchen cabinets, make whatever repairs are necessary, possibly reface a couple of them because the veneer is coming off. And then we can put our base cabinets in and screw them in from the outside like we did on the bunkbed. So, that’s the next step, and hopefully we can reuse some of those original cabinets and not have to go out and find some or build some.
Our holding tanks arrived, so it was a good time to install them and complete some of the drain plumbing. Hey Tyler, look here, we just got our black water holding tank and our grey water holding tank today. And the other day, I actually got the combination shower and toilet pan that’s going to go in the bathroom. Now, do you remember when we bought the trailer, all it had in the bathroom was a toilet? That toilet only had like a five gallon holding tank, which–and it didn’t even have a grey tank, this is the grey tank. So, what I did was I was concerned about weights, but I got–I think this is a 16 gallon black tank, and that’s a nine gallon grey tank for the kitchen sink. You know what? Let me show you something, come here.
 When someone buys a new RV, they normally have a black water holding tank that’s just for the toilet. And then they have a grey water tank that all the sinks and the shower drain into, okay? On some small RVs, sometimes the manufacturer will combine the toilet and the shower and have it drain into the black tank, and then they’ll use the grey tank for one of the sinks. Tyler: So, is that what we’re doing? Mark: Yeah, that’s what we’re going to do. We’re going to take that black tank, and it’s 16 gallons, we’re going to combine the shower and the toilet into it. And then we’re going to use the really small grey tank and just hook it up for the kitchen sink. You’ll probably be able to take one or two quick showers, and then it’s going to be time to empty the holding tanks. So, let’s go measure that, make sure it’s going to work, then we can start framing in the bathroom walls, all right?
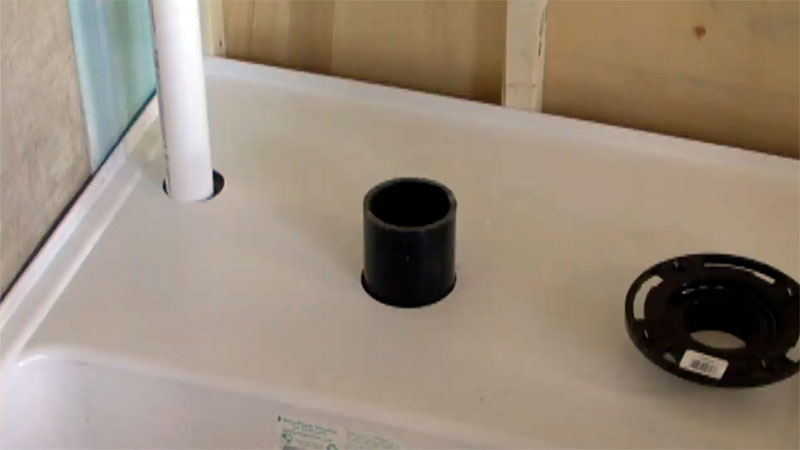
Hey, we’ve got our holding tank in place. And all I’m gonna do is take a little bit of spray paint, put it on the pipe, put the pipe down through our hole in the floor, and that’ll mark the tank where we want to put our flexible fitting in the tank. Okay, all I’m going to do is take our pipe with the paint on it, put it down until it makes contact with the tank, spin it around a little bit. That’ll put a mark on the tank. And there’s where we need to make our hole.
We’ve got our waste valves here. And we’re going to go ahead and connect it to the black water holding tank, and then, I’m going to plumb some lines from the grey tank, tie into this. And then basically, our grey and black water holding tanks will be completed except for inside with the kitchen sink. When you’re working with these, you want to make sure you use a cleaner, clean the fitting real well. And you want to make sure that there’s no sharp edges from where you made your cuts that could catch like toilet paper
or something when you’re trying to drain the tanks. You can just take a piece of sandpaper and scuff it up.
Now, you can start to see how the new floorplan is shaping up. Join us next time when we install a new rubber roof and get the trailer prepped to install some of the appliances.
We’ll see you then.
Happy camping,
Mark Polk
To learn more about how to use your RV,
check out our e-book training courses and video training courses available at rvonlinetraining.com
Happy RV Learning,
Mark Polk, your trusted source for RV education
RV Education 101