
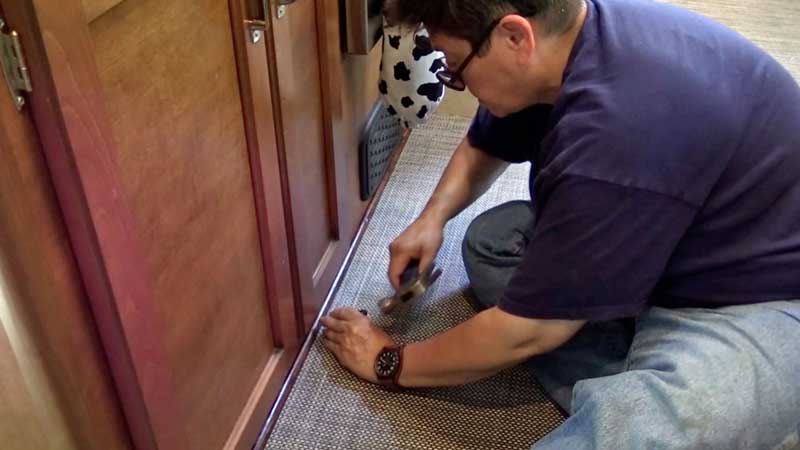
In this part 2 install of the Infinity Luxury Woven Flooring, we jump right in by unscrewing the threshold. And we found underneath the threshold were three lines. But there’s room for the flooring, so we’re good. The other moldings we took off and they had little, short barbs on them, so we knew we’d have to add longer nails.
The template is simply made with craft paper and masking tape. And there it is, our template. Now, we pick it up and bring it outside. Lay it on the material.
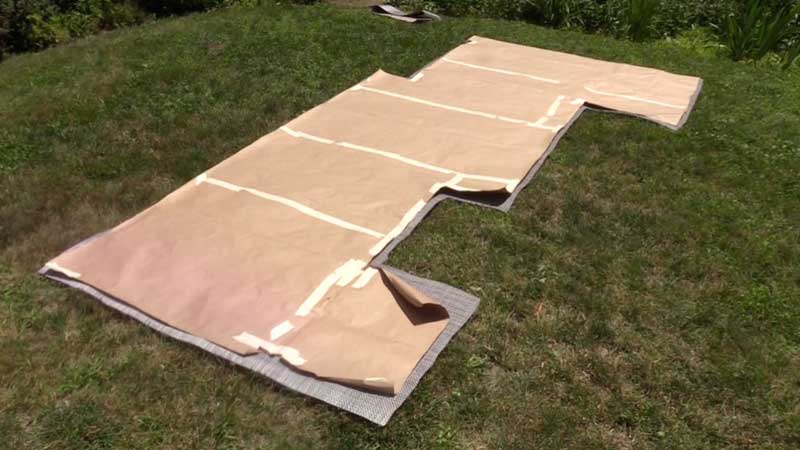 I left the material out for 30 minutes, it was a bright, sunny day. Let it acclimate. And then I rough cut to get some of that extra material away, and then cut closer. Again, even though it was pretty thick, the scissors did a fine job at this point. And there it is, the cutout template.
Prepping the floor can be one of the worst parts of any job like this, but it’s a new floor. All I had to do was sweep it and give it a nice wash down. Now that we’re into this project, I’m realizing a couple of things. I’m not as flexible as I used to be and–but I’m gonna take my time and get this done, and it may be the last time I do it.
The other thing I wanted to share is that, out in the grass, I was using scissors. And I thought, “I can finish this off with scissors inside. But because there’s no molding around most of this, you really can’t use scissors, it’s not going to come out perfect. And I can see right here it’s not perfect, so I went and got the right tools, and now I’m going to finish the job up.
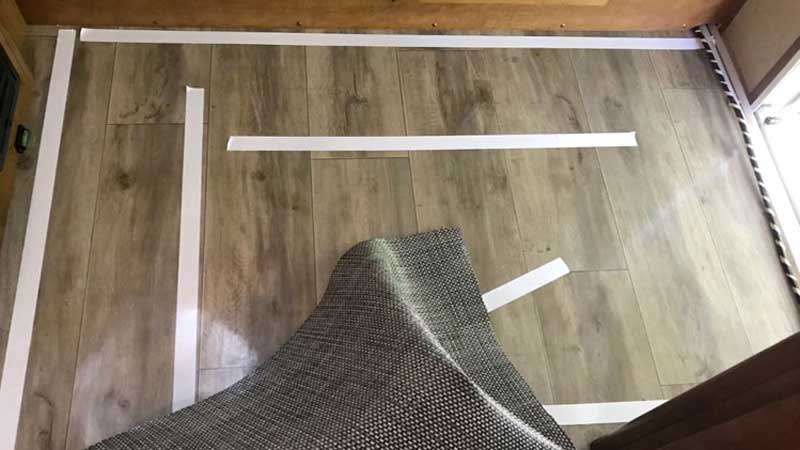 We used double sided tape instead of glue. Near the front door where the lines are, the water and electric, and I’m slipping it under. Because the threshold is going over here scissors are fine, that edge isn’t going to show. But where the edges show, you need to use a straightedge and a razor.
We were pretty happy with the way it came out, both into the bathroom and overall. We finished it off with molding even in places where there was no original molding. Once the floor was done, it was time to do under our table. Laurie pulled off the top, the pedestal.
 Laurie Church: So, what we’re doing next is we’re going to take the base of the dinette table out, which requires a special tip. Now, most RVs are put together using not your typical Philips head or flathead screw, they have a square tip. And most local hardware stores will have them, just ask and let them know you’re working on an RV.
So, we’re going to line our cupboards, 12 inches by 22 inches. I cut two pieces. And because this has a nice foam back, we’re going to put that face up. Let me slide this one in first. Doesn’t need any tape because it’s not going anywhere. And now we can see it’s not going to go anywhere as we’re driving down the road, see?
Okay, now the top piece could slide out, so we want that to be stable, especially since we’re going to put the vinyl down. So, I put a piece of double-sided tape here. And we’ll just slip that in foam side up. And now I can put this stuff back into the cupboard. Putting this into the bottom made a really nice difference.
Thank you to Infinity Luxury Woven Vinyl for the flooring.